Our coordination framework for multi-robot exploration needs to know the current robot’s pose (position and orientation) within the explored map frame.

There are two ways to achieve it:

1 – Using costmap function.

 bool costmap_2d::Costmap2DROS::getRobotPose(tf::Stamped& global_pose) const

2 – Using tf listener.

 geometry_msgs::PoseStamped pose_stamped;

 pose_stamped.header.stamp = ros::Time::now();
 pose_stamped.header.frame_id = tf_prefix + "/" + map_frame;

 pose_stamped.pose.position.x = transform.getOrigin().getX();
 pose_stamped.pose.position.y = transform.getOrigin().getY();
 pose_stamped.pose.position.z = transform.getOrigin().getZ();

 pose_stamped.pose.orientation.x = transform.getRotation().getX();
 pose_stamped.pose.orientation.y = transform.getRotation().getY();
 pose_stamped.pose.orientation.z = transform.getRotation().getZ();
 pose_stamped.pose.orientation.w = transform.getRotation().getW();

 pose_publisher.publish(pose_stamped);

A complete implementation of the second method can be found http://wiki.ros.org/pose_publisher.

Both methods need a transform from “map” to “odom” (gmapping can do this).

Our coordination framework will be released after the corresponding paper has been published.

deprecated

cf. https://github.com/CARMinesDouai/pharos/wiki/Install-PhaROS

To install:

  1. Install Ubuntu 14.04 64bits
  2. Install curl
    sudo apt-get install curl
  3. Install ROS Indigo
  4. Install PhaROS
    curl http://car.mines-douai.fr/scripts/PhaROS | bash
  5. Test the installation
    source ~/.bashrc
    pharos create myfirstpharospackage
    rosrun myfirstpharospackage edit
  6. Enjoy!

To uninstall (why would you need that? ;-)):

~/PhaROS-bin/pharos_uninstall

Jetstorm is the library to make Pharo communicate with the Lego Mindstorm Ev3. We provide the technical report. It explains the protocol and the architecture of the library.

If you want to cite it, here is the lines to copy and paste in bibtex:

@techreport{Lava14a,
   Author = {Jannik Laval},
   Institution = {URIA -- Ecole des Mines de Douai},
   Title = {JetStorm - A communication protocol between Pharo and Lego Mindstorms},
   Url = {www.jannik-laval.eu/assets/files/papers/Lava14a-JetStorm.pdf},
   Year = {2014}
}

With the evolution of JetStorm, the Technical Report will be improved.

Recently, our research team tested a new robotics simulator named STDR Simulator. The simulator natively supports ROS Hydro, but we have still successfully installed it on ROS Groovy. Here is our installation record, hoping to help someone. (This record is also released on wiki.ros.org)

1. Get stdr_simulator from Github

Since stdr_simulator is a catkin package, you will need a catkin workspace in order to build the package from source. If you don’t already have a catkin workspace, you will find details in this ros tutorial.

cd your_catkin_ws/src
git clone https://github.com/stdr-simulator-ros-pkg/stdr_simulator.git

NOTE: on Ubuntu 13.04 (raring), where Qt5 is installed by default, you need to specify the path to qmake-qt4 when you invoke catkin_make:

catkin_make -DQT_QMAKE_EXECUTABLE=/usr/bin/qmake-qt4

2. Get cmake_modules for Groovy from Github

cmake_modules is a common repository for CMake Modules which are not distributed with CMake but are commonly used by ROS packages. You will need this package to solve some problems such as stdr_parser: Could not find module FindTinyXML.cmake.

git clone https://github.com/ros/cmake_modules.git

3. Get a catkin version map_server

You need to get a Groovy compatible catkin map_server package for compiling stdr_server and stdr_gui package: map_server. Then put it in your_catkin_ws/src

4. Build the simulator

Assuming you are still in your_catkin_ws/src directory:

cd ..
catkin_make

5. Possible problems in header or library path with map_server

Error 1: stdr_server/map_loader.h:32:37: fatal error: map_server/image_loader.h: No such file or directory

The easiest way to solve this error is that just replace #include “map_server/image_loader.h” by #include “the_absolute_path_of/map_server/image_loader.h” in stdr_server/map_loader.h file.

Error 2: /usr/bin/ld: cannot find -limage_loader

Solution:

sudo ln -s /opt/ros/groovy/stacks/navigation/map_server/lib/libimage_loader.so /usr/lib/libimage_loader.so

Goal

Automatically copy files that are added or modified in a specific folder of an svn repository.
Useful for Web sites, …

Prepare a post-commit script

cd /svn/robots/hooks
cp post-commit.tmpl post-commit
chmod ug+x post-commit

Be careful of the owner/group of this post-commit file because it is the unix user that is dedicated to execute post-commits that must have executable rights.

The post-commit script

Example of script that checks if files in “PhaROS/Scripts” are involved in the latest commit.
If yes, copy them in /var/www.

#!/bin/sh

REPOS="$1"
REV="$2"

for scriptfile in `svnlook changed /svn/robots | awk -F "PhaROS/Scripts/" '{print $2}' | xargs`; do
        svn export --force --non-interactive -q  file:///svn/robots/PhaROS/Scripts/$scriptfile /var/www/Scripts/$scriptfile
done

Test the script

./post-commit /svn/robots 395

Be careful of the rights here too.
This post-commit script may be executed by a different user than yours when testing like above.
The real test is to modify the files in a repository copy and effectively do a commit.

Lots of fonts are available for LaTeX here

1. Example: install the emerald package

wget http://mirrors.ctan.org/fonts/emerald.zip
unzip emarald.zip

ln -s ~/Libary/texmf .texmf # because I am on mac

cp -fr emeral/tex/latex/emarald/ ~/.texmf/
cp -fr emeral/fonts ~/.texmf/

cd ~/.texmf
texhash .

cd ~/.texmf/fonts/map/dvips/emerald.map
updmap updmap --enable Map emerald.map

2. emerald-test.tex

\documentclass[11pt]{article}

\usepackage{emerald}
\usepackage{lipsum}

\title{Emerald testing}
\author{Luc Fabresse}
\date{}

\setlength{\parskip}{2ex}

\newcommand{\showFontaux}{normalfont}
\newcommand{\showFont}[1]{%
	\renewcommand{\showFontaux}{#1}%
	\csname \showFontaux \endcsname%
	\marginpar{\vspace*{0.6cm}\small\csname \showFontaux \endcsname #1}%
	\lipsum[2]%
	\normalfont
}

\begin{document}
\maketitle

We are going to try a series of standard Laserwriter fonts.

\showFont{ECFAugie}
\showFont{ECFJD}
\showFont{ECFAPictureAlphabet}
% \showFont{ECFDecadence}
% \showFont{ECFDecadenceWithoutTheDiamonds}
% \showFont{ECFDecadenceCondensed}
% \showFont{ECFDecadenceInTheDark}
% \showFont{ECFDecadenceInTheDarkCondensed}
% \showFont{ECFDecadenceInADifferentLight}
% \showFont{ECFDecadenceInTheDarkCondensedMarquee}
\showFont{ECFIntimacy}
\showFont{ECFIntimacyDeux}
\showFont{ECFMovieola}
\showFont{ECFMovieolaTitleType}
\showFont{ECFPookie}
\showFont{ECFPookieType}
\showFont{ECFSkeetch}
\showFont{ECFSpankysBungalow}
\showFont{ECFSpankysBungalowItalico}
\showFont{ECFSpankysBungalowBlanco}
\showFont{ECFSpankysBungalowBlancoItalico}
% \showFont{ECFSyriac}
\showFont{ECFTallPaul}
\showFont{ECFTeenSpirit}
\showFont{ECFWebster}

\end{document}

3. Compile and see

pdflatex emerald-test.tex

Learning ROS
I’ve recently finished to read the book titled “Learning ROS for Robotics Programming”, written by Aaron Martinez and Enrique Fernández and edited by PACKT publishing.

This is a must-read for any developer who wants to understand ROS deeper. The authors have written a really good book as well as to learn ROS (for complete beginners) and also to improve knowledge of more confirmed ROS developers. The book is well written and very pedagogic. And the most important, I think, is that the topics of the chapters are carefully chosen. This means that depending on your ROS experience you can directly jump to some chapters. Nevertheless, this book does not target advanced ROS users.

Chapter 1 (Getting Started with ROS) is a great introduction to ROS. I liked the history and the installation process descriptions for both Electric and Fuerte versions of ROS. I only regret that this book (fist published in September 2013) does not focus on Groovy which is now the stable version. But this is not critical and installation process can be easily applied to Groovy or even Hydro (current unstable version of ROS). Moreover, it also important to note that some ROS stacks still work better on Fuerte.

Chapter 2 (The ROS Architecture with Examples) explains very well the basics of ROS: nodes, topics, master, parameter manager, … It then gives examples of installing and creating its own nodes. This is a must read to begin with ROS and I will recommend it to all my students. Again, I only regret that it does not explain the new Catkin package management included in newer ROS versions.

Chapter 3 (Debugging and Visualisation) shows that the authors really know the daily job of robots developers ;-). I really appreciate finding this kind of information in this a ROS book because robot development is hard and error prone. It should not be idealised and it is not in this book. Most of the time, you will ask yourself: “what is going on?” and you need some tools to investigate and localize the bug. This chapters present all the tools needed to debug from GDB to ROS tools such rviz, wtf, … I really liked this chapter because debugging is IMPORTANT and I learnt things that will now help me to be more efficient when debugging.

Chapter 4 (Using Sensors and Actuators with ROS) presents how to use “common” robotics sensors with ROS. In my case, I was interested by kinect, Arduino and Xsens.

Chapter 5 (3D Modelling and Simulation) presents how to use simulation tools from URDF models loaded in rviz to real Gazebo simulations. This chapter is classical. Nevertheless, I want to report about a small but usefull section that explains how to do a 3d model of a robot in Google Sketchup and then import it in rviz. This is interesting because it shows how to add support into ROS for non-ROS robots that we all have in our labs!

I cannot give an opinion on chapter 6 (Computer vision) because I am less involved in this topic.

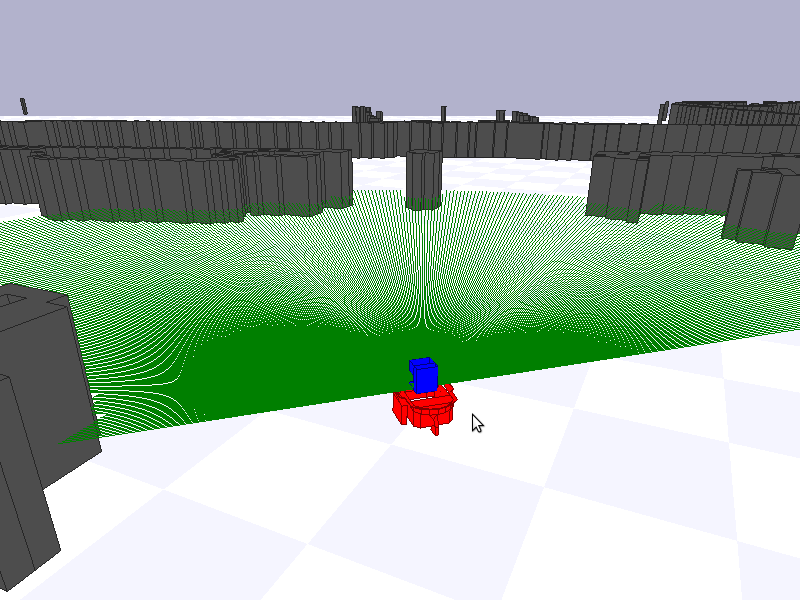
Chapter 7 (Navigation stack) and Chapter 8 (Navigation stack – Beyond setups) are completely in my current activities. Chapter 7 explains how to adapt the navigation stack to your robot. This is exactly what we did in our lab for some non-ROS robots. It would have been good to read this chapter before doing it, I am sure we would have been faster! Chapter 8 describe some tuning elements. Indeed, the navigation stack is full of parameters at different levels that make the difference between a “good” and a “bad” behaviour. All of these parameters (fixed values) are difficult to set up and sometimes difficult to determine. This chapter gives some useful insights on how to proceed.

Chapter 9 (Combining Everything – Learn by doing) presents some standard ROS installations for different known robots such as REEM, PR2, Robonaut 2, Husky and Turtlebot. We have multiple Turtlebots 2 in our lab. I must admit that the 2 pages on this robot base in chapter did not help me very much. But, other robots such as the PR2 is far more described and you can use it in Gazebo simulations.

Firstly, assuming you have already installed ROS Groovy and MORSE 1.x.x.

Then you need two additional packages p2os and exploration:

git clone https://github.com/allenh1/p2os.git
svn co https://svn.code.sf.net/p/bosch-ros-pkg/code/trunk/stacks/exploration

Finally, download the attachment (yz_morse_sim), decompress it and enter into the folder morse_sim.

Now, let’s start the simulation!

1. Launch roscore in a terminal window:

roscore

2. Launch MORSE simulator in a new terminal window:

morse run single_robot.py

3. Launch ROS nodes in a new terminal window (This step will also launch gmapping and rivz):

roslaunch single_robot.launch

4. Save the map if you want, in a new terminal window:

rosrun map_server map_saver

Done!

Firstly, assuming you have already installed ROS Groovy and Stage 3.x.x.

Then you need two additional packages p2os and exploration:

git clone https://github.com/allenh1/p2os.git
svn co https://svn.code.sf.net/p/bosch-ros-pkg/code/trunk/stacks/exploration

Finally, download the attachment (yz_stage_sim), decompress it and enter into the folder stage_sim.

Now, let’s start the simulation!

1. Launch roscore in a terminal window:

roscore

2. So, you have three options to implement the exploration: teleoperation, exploration and exploration with SLAM, in a new terminal window:

roslaunch teleop.launch (or explore.launch, or explore_slam.launch)

3. You can track the exploration progress by using rviz, in a new terminal window:

rosrun rviz rviz -d stage.rviz

4. If you want build a map by teleoperation, in a new terminal window:

rosrun gmapping slam_gmapping scan:=base_scan

5. Save the map, in a new terminal window:

rosrun map_server map_saver

Done!