As part of our contribution to the DATA paroject, Sang is working on a demo with a turtlebot. It’s based on Pharo and ROS. Checkout the first video below. You can find out more details on Sang’s blog.
Category Archives: Video
Nao Writes Arbitrary Words
Some of our students work on this project. They used Pharo and ROS to make Nao write arbitrary words. Since the robot motion is not very precise, they made up a simple but smart solution to allow the robot can push the page after writing each letter.
An experiment on WiFi-based indoor localization
The video below presents an experiment made by two students at Mines Douai (Max MATTONE and Suzanne SHOARA) to achieve indoor localization based on WiFi signals.
Writer Robot Using Lego Mindstorms EV3 and Phratch
A group of our students implemented this nice Writer Robot as part of a project where they learn programming using Phratch.
A ROS-based Testbed for Large-scale Robot Simulations Using a Computer Cluster
Collaborative Exploration of Indoor Environment with Two RobuLAB-10 Robots
Controlling robots with PhaROS
An example of a robotic guide at Ecole des Mines de Douai.
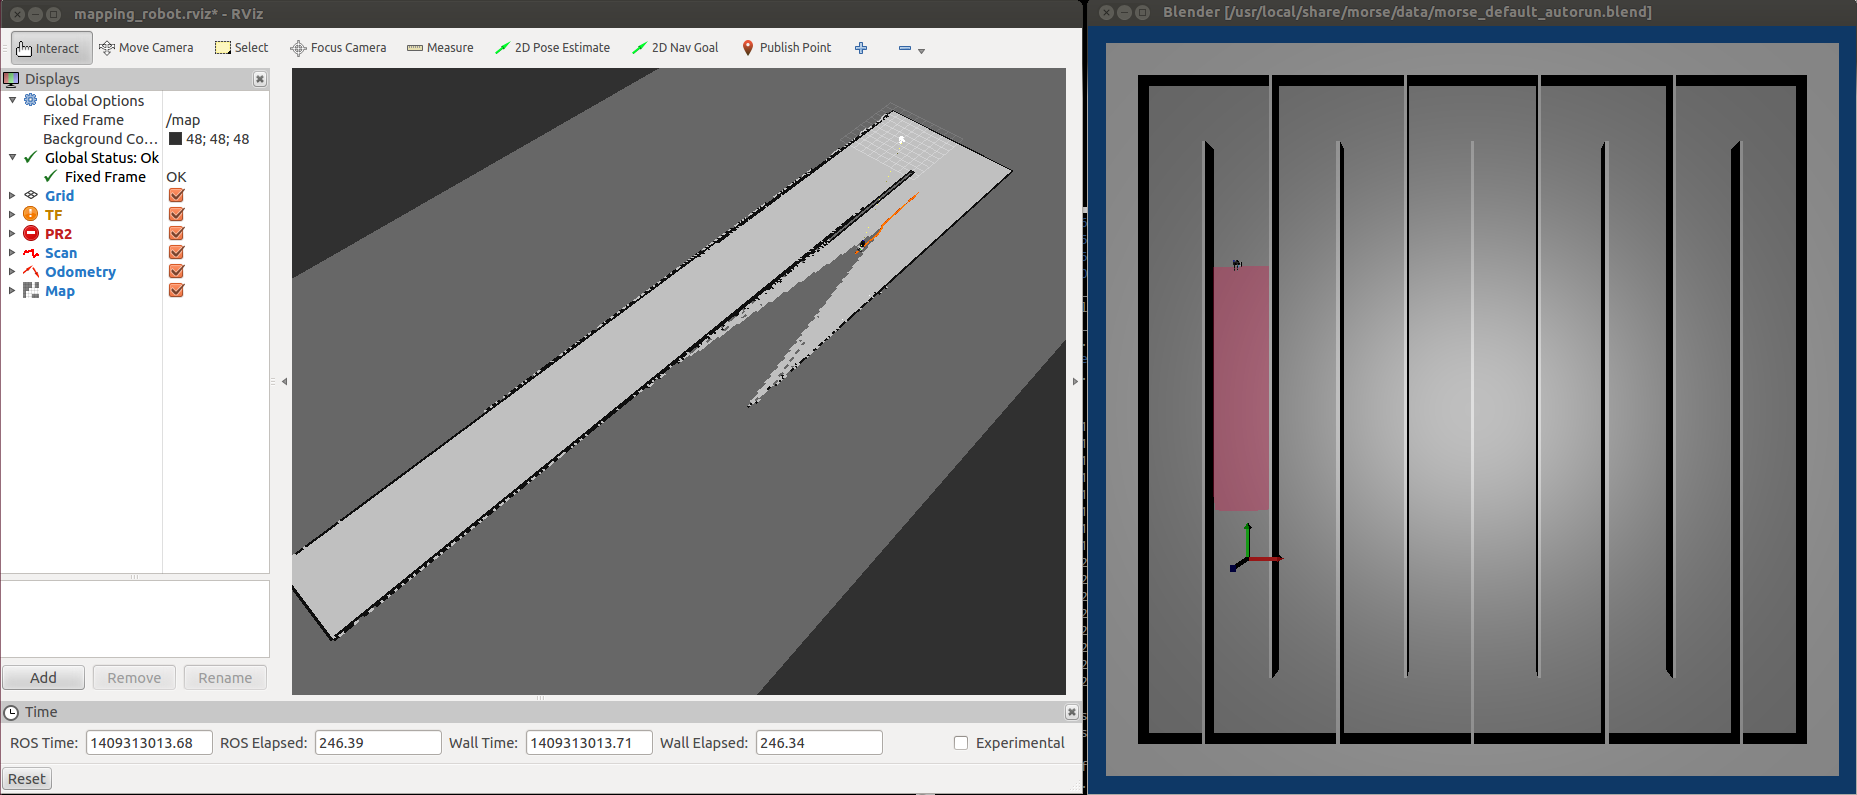
Manually building an environment map in MORSE
To check the accuracy of the exploration map, we need to compare with a pre-built one.
Of course, the latter needs to have a good accuracy.
We provide here a tool to manually build an environment map in MORSE.
This tool has the following features:
- Map building using gmapping ROS package.
- Robot with perfect odometry.
- Visualize the mapping process using rviz ROS package.
Robulab’s first lesson of LRP through PhaROS
The objective of this tutorial is to be able to create a behaviour for the Robulab described using Live Robot Programming. The LRP program transparently uses PhaROS to communicate with the Robulab.
Let’s do it step by step
- Follow the instructions to have Robulab working specified in this tutorial.
-
Open the image you created on the previous step and download the LRP code1
Gofer it smalltalkhubUser: 'jfabry' project: 'LiveRobotProgramming'; configuration; loadDevelopment -
Download the code with the example by executing the following snippet on a workspace:
Gofer new smalltalkhubUser: 'mcamp' project: 'RobotExperiments'; package: 'LrpharosPackage'; load. -
Let’s check everything is ok before launching LRP UI:
- The laptop is connected to UBNT network
roscoreis running.- You have cleaned processes by executing
ProcessesCleaner clean. - You started the driver node for kompai.
-
Our example needs a PhaROS node subscribed to
/kompai2/poseand another node publishing on/command_velocity, to do so you need to create a instance ofLrpharosPackage. Due to the live feature of LRP, it needs to have an unique instance of the package (which contains the nodes).LrpharosPackage uniqueInstance -
Open the LRP UI by right-clicking the World and selecting ** Live Robot Programming **. It will open a window like this:
-
Now, copy&paste the following script into the left pane (You can find it also in
LrpharosPackage class>>lrpSimple)(var robulab := [LrpharosPackage uniqueInstance]) (var stop := [0]) (machine simple (state forward (onentry [robulab value forward: 0.1]) ) (state stop (onentry [robulab value stop]) ) (state finish (onentry [robulab value stop]) ) (on forceStop *-> finish t-finish) (event forceStop [stop value = 1]) (ontime 2000 forward -> stop t-f) (ontime 1000 stop -> forward t-s) )It should look something like this
-
Now we are almost close to launch the script. Before that you should be aware to have ways to stop it in an emergency case: have a remote joystick or just switch it off.
-
To trigger it add the following line at the end of the script:
(spawn simple forward)Et voilà! The robot will start moving forward and then stop as the two steps.
-
An alternatively way to stop the robot using the LRP UI is by setting the
stopvariable to 1 in the ** Variables: ** pane. -
After stopping the robot, if you want to re-start it you have to click Reset Int. button in the bottom of the left pane.
Any question? Feel free to ask below.
NOTES
-
LRP uses Roassal visualization engine for displaying the machines, states and transitions. After LRP is installed, you should run do a few simple steps in order to avoid a small-but-hard-to-solve bug related to fonts. You can fix it in less than 1 minute following the instructions here.
-
Each time you need to clean the proccesses through
ProcessesCleaner clean, the LRP process is terminated. Then you have to close the window after doing it. -
Everytime you create a kompai node (through
PureROS new scriptKompai1orscriptKompai2) you should then reset the LRP singleton by executing:LrpharosPackage reset.This way the LrpharosPackage instance will be bound to the correct kompai node.
Talking to Robots with Pharo
Slides of my presentation given at ESUG 2014 conference are available online (see below). It’s about Robot software development using the Pharo dynamic language. It includes a quick overview of PhaROS our bridge to the ROS, as well as BoTest our framework for TDD for robotics applications. The video is also available on Youtube (see below) thanks to ESUG student volunteers. Note it is in two parts.