Our coordination framework for multi-robot exploration needs to know the current robot’s pose (position and orientation) within the explored map frame.

There are two ways to achieve it:

1 – Using costmap function.

 bool costmap_2d::Costmap2DROS::getRobotPose(tf::Stamped& global_pose) const

2 – Using tf listener.

 geometry_msgs::PoseStamped pose_stamped;

 pose_stamped.header.stamp = ros::Time::now();
 pose_stamped.header.frame_id = tf_prefix + "/" + map_frame;

 pose_stamped.pose.position.x = transform.getOrigin().getX();
 pose_stamped.pose.position.y = transform.getOrigin().getY();
 pose_stamped.pose.position.z = transform.getOrigin().getZ();

 pose_stamped.pose.orientation.x = transform.getRotation().getX();
 pose_stamped.pose.orientation.y = transform.getRotation().getY();
 pose_stamped.pose.orientation.z = transform.getRotation().getZ();
 pose_stamped.pose.orientation.w = transform.getRotation().getW();

 pose_publisher.publish(pose_stamped);

A complete implementation of the second method can be found http://wiki.ros.org/pose_publisher.

Both methods need a transform from “map” to “odom” (gmapping can do this).

Our coordination framework will be released after the corresponding paper has been published.

To check the accuracy of the exploration map, we need to compare with a pre-built one.

Of course, the latter needs to have a good accuracy.

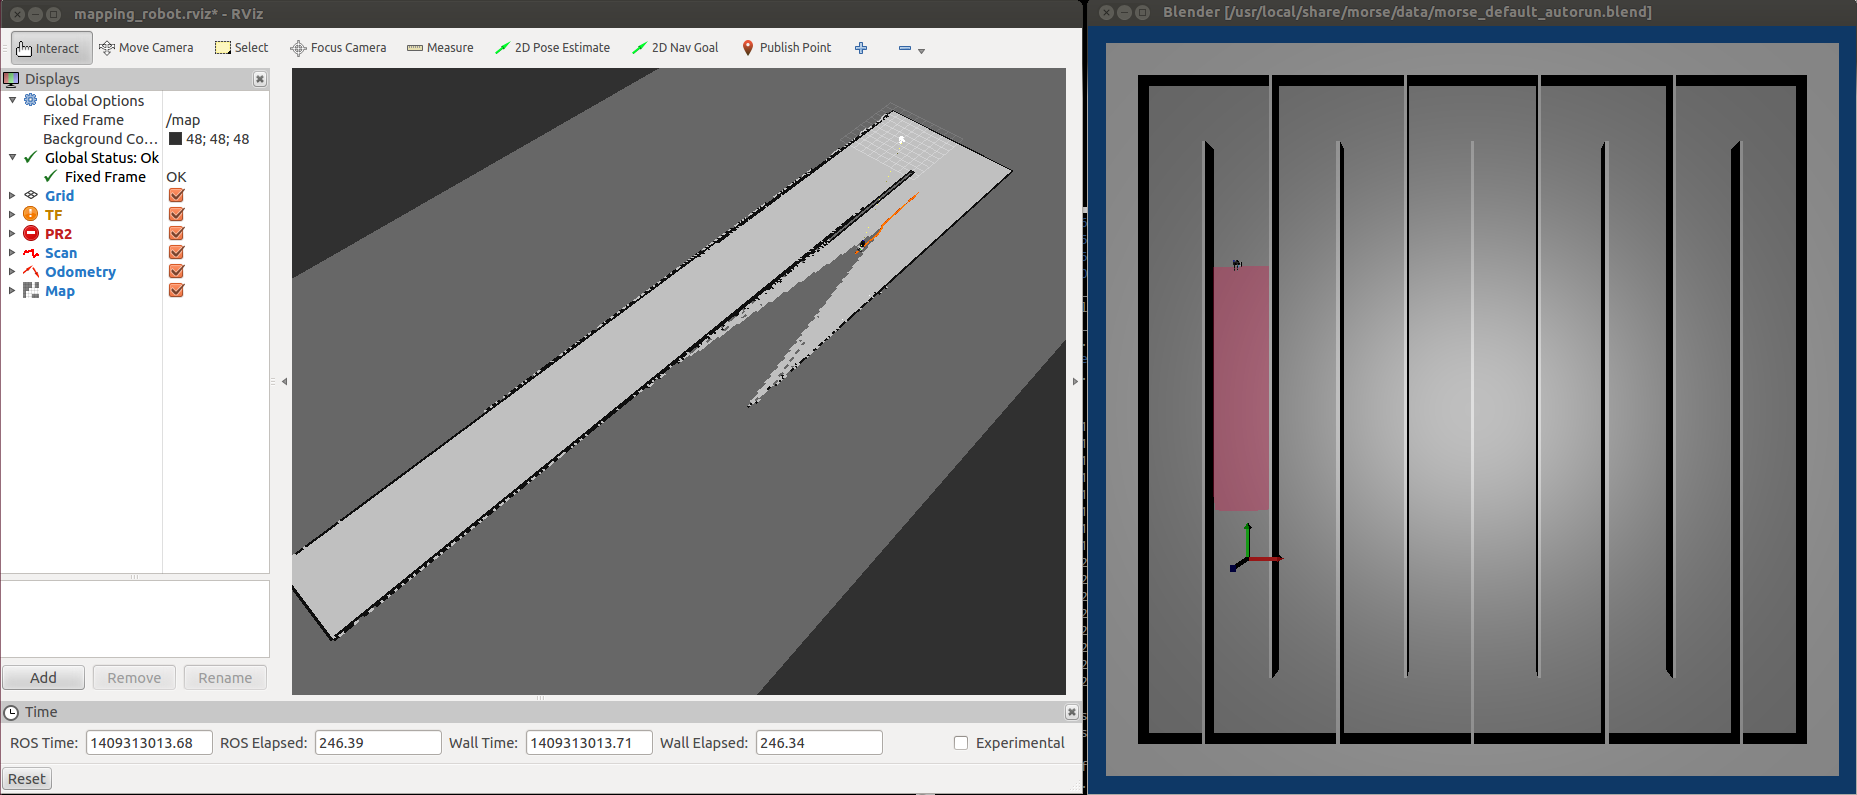
We provide here a tool to manually build an environment map in MORSE.

This tool has the following features:

  1. Map building using gmapping ROS package.
  2. Robot with perfect odometry.
  3. Visualize the mapping process using rviz ROS package.

The objective of this tutorial is to be able to create a behaviour for the Robulab described using Live Robot Programming. The LRP program transparently uses PhaROS to communicate with the Robulab.

Let’s do it step by step

  1. Follow the instructions to have Robulab working specified in this tutorial.
  2. Open the image you created on the previous step and download the LRP code1

    Gofer it
        smalltalkhubUser: 'jfabry' project: 'LiveRobotProgramming';
        configuration;
        loadDevelopment
    
  3. Download the code with the example by executing the following snippet on a workspace:

    Gofer new smalltalkhubUser: 'mcamp'
        project: 'RobotExperiments';
        package: 'LrpharosPackage';
        load.
    
  4. Let’s check everything is ok before launching LRP UI:

    • The laptop is connected to UBNT network
    • roscore is running.
    • You have cleaned processes by executing ProcessesCleaner clean.
    • You started the driver node for kompai.
  5. Our example needs a PhaROS node subscribed to /kompai2/pose and another node publishing on /command_velocity, to do so you need to create a instance of LrpharosPackage. Due to the live feature of LRP, it needs to have an unique instance of the package (which contains the nodes).

    LrpharosPackage uniqueInstance
    
  6. Open the LRP UI by right-clicking the World and selecting ** Live Robot Programming **. It will open a window like this:

    Live Robot Programming UI

  7. Now, copy&paste the following script into the left pane (You can find it also in LrpharosPackage class>>lrpSimple)

    (var robulab := [LrpharosPackage uniqueInstance])
    (var stop := [0])
    (machine simple
        (state forward
            (onentry [robulab value forward: 0.1])
        )
        (state stop
            (onentry [robulab value stop])
        )
        (state finish
            (onentry [robulab value stop])
        )
    
        (on forceStop *-> finish t-finish)
        (event forceStop [stop value = 1])
    
        (ontime 2000 forward -> stop t-f)
        (ontime 1000 stop -> forward t-s)
    )
    

    It should look something like this

    Forward-Stop machine

  8. Now we are almost close to launch the script. Before that you should be aware to have ways to stop it in an emergency case: have a remote joystick or just switch it off.

  9. To trigger it add the following line at the end of the script:

    (spawn simple forward)
    

    Et voilà! The robot will start moving forward and then stop as the two steps.

  10. An alternatively way to stop the robot using the LRP UI is by setting the stop variable to 1 in the ** Variables: ** pane.

    Stop the robot by setting stop variable

  11. After stopping the robot, if you want to re-start it you have to click Reset Int. button in the bottom of the left pane.

Any question? Feel free to ask below.

NOTES

  1. LRP uses Roassal visualization engine for displaying the machines, states and transitions. After LRP is installed, you should run do a few simple steps in order to avoid a small-but-hard-to-solve bug related to fonts. You can fix it in less than 1 minute following the instructions here.

  2. Each time you need to clean the proccesses through ProcessesCleaner clean, the LRP process is terminated. Then you have to close the window after doing it.

  3. Everytime you create a kompai node (through PureROS new scriptKompai1 or scriptKompai2) you should then reset the LRP singleton by executing:

    LrpharosPackage reset.
    

    This way the LrpharosPackage instance will be bound to the correct kompai node.

In this tutorial you will be able to get the laser and odometry data from a Robulab robot published into ROS topics.

Setup

You must ensure to meet all the requirements listed in the section Setup in Testing Robulab‘s post.

Install

  1. Create a fresh PhaROS image by executing in a terminal:

    $ pharos create newimage
    
  2. Open the image. This will open Pharo IDE.

    $ rosrun newimage edit
    
  3. For ease Proxy (de)activation and Process cleaning (stoping & terminating PhaROS nodes), we recommend you to install the CAR shortcuts workspace: open a workspace, copy&paste the following script, select it completely and Do-it:

    Gofer new smalltalkhubUser: 'PabloEstefo'
        project: 'ExperimentUtils';
        package: 'Experiment-Utils';
        load.
    (Smalltalk at: #EUWorkspace) open.
    
  4. It will open a new workspace titled CAR Utils that will have the following shortcuts:

    • ProxySwitch on to activate HTTP proxy

    • ProxySwitch off to deactivate it

    • ProcessesCleaner clean to terminate all non-critical processes. This will terminate any PhaROS node running. It is useful when you edit some script and want to relaunch it.

  5. Then install the required software for controlling Robulab robot by selecting and Do-it the following script on an empty workspace:

    Gofer it
        smalltalkhubUser: 'CAR'
        project: 'Robulab';
        configurationOf: 'PureROS';
        load.
    ((Smalltalk at: #ConfigurationOfPureROS) project version: #bleedingEdge) load: {'kompai'}.
    

Test

  1. Start roscore: in a terminal execute

    $ roscore

  2. Start the main script driver for Robulab1:

    1. On the CAR Utils workspace, select and Do-it ProxySwith off to deactivate HTTP Proxy

    2. Write in a workspace & Do-it the following script:

    PureROSKompai new scriptKompai1

    In case you are using the Kompai2 Robulab, launch the script scriptKompai2 instead.

  3. Let’s see which topics are available. To do so, in a terminal execute:

    $ rostopic list

    and you should see

    /command_velocity
    /example/string
    /initialpose
    /kompai/scan
    /kompai2/pose
    /kompai2/trajectory/differential
    /orientation
    /rosout
    /rosout_agg
    
  4. Ok, now we know that laser (/kompai/scan) and pose (/kompai2/pose) topics exist, let’s inspect the data the robot is publishing into those topics. First we will see pose data by executing:

    $ rostopic echo /kompai2/pose

    and you should see something like this:

    header:
      seq: 65593
      stamp:
        secs: 1407481583
        nsecs: 757790000
      frame_id: /map
    pose:
      position:
        x: 0.0
        y: 0.0
        z: 0.0
      orientation:
        x: 0.0
        y: 0.0
        z: 0.0
        w: 1.0
    ---
    
  5. The same way, let’s inspect laser data by executing:

    $ rostopic echo /kompai/scan

    and you will see something like this:

    ---
    header:
      seq: 529
      stamp:
        secs: 1407331004
        nsecs: 244896000
      frame_id: /laser
    angle_min: -2.36492109299
    angle_max: 2.34746789932
    angle_increment: 0.0174532923847
    time_increment: 0.0
    scan_time: 0.0
    range_min: 0.170000001788
    range_max: 3.80999994278
    ranges: [0.17000000178813934, 2.109999895095825, 2.109999895095825, 3.809999942779541, 3.7899999618530273, 3.740000009536743, 3.7100000381469727, 3.6700000762939453, 3.630000114440918, 1.9500000476837158, 1.909999966621399, 1.8899999856948853, 1.8799999952316284, 1.8700000047683716, 1.5299999713897705, 1.5299999713897705, 1.5099999904632568, 1.5, 1.4900000095367432, 1.4700000286102295, 1.4700000286102295, 1.4500000476837158, 1.4600000381469727, 1.4500000476837158, 1.4299999475479126, 1.4199999570846558, 1.4199999570846558, 1.5499999523162842, 1.7000000476837158, 1.7100000381469727, 1.7100000381469727, 1.7000000476837158, 1.7000000476837158, 1.7000000476837158, 1.7000000476837158, 1.7000000476837158, 1.690000057220459, 1.7000000476837158, 1.690000057220459, 1.7000000476837158, 1.7100000381469727, 1.7000000476837158, 1.7000000476837158, 1.7100000381469727, 1.7100000381469727, 1.7100000381469727, 1.7300000190734863, 1.7300000190734863, 1.7300000190734863, 1.7400000095367432, 1.7400000095367432, 1.75, 1.7599999904632568, 1.7699999809265137, 1.7799999713897705, 1.7899999618530273, 1.7999999523162842, 1.809999942779541, 1.8300000429153442, 1.840000033378601, 1.850000023841858, 1.8799999952316284, 1.8899999856948853, 1.899999976158142, 1.9299999475479126, 0.699999988079071, 0.6499999761581421, 0.6200000047683716, 0.6100000143051147, 0.5899999737739563, 0.5899999737739563, 0.5600000023841858, 0.5899999737739563, 0.5899999737739563, 0.5899999737739563, 0.5699999928474426, 0.5699999928474426, 0.5699999928474426, 0.5699999928474426, 0.5799999833106995, 0.6399999856948853, 2.059999942779541, 2.069999933242798, 2.059999942779541, 2.0799999237060547, 2.0899999141693115, 2.0999999046325684, 2.0899999141693115, 0.8899999856948853, 0.8799999952316284, 0.8999999761581421, 2.4800000190734863, 2.430000066757202, 2.390000104904175, 2.359999895095825, 2.3299999237060547, 2.2899999618530273, 2.259999990463257, 2.2300000190734863, 2.200000047683716, 2.1700000762939453, 2.1500000953674316, 1.0499999523162842, 1.0099999904632568, 0.9900000095367432, 0.9700000286102295, 0.9700000286102295, 0.949999988079071, 0.9399999976158142, 0.949999988079071, 0.9599999785423279, 2.0199999809265137, 2.009999990463257, 2.0, 1.9800000190734863, 1.9800000190734863, 1.9700000286102295, 1.9600000381469727, 1.940000057220459, 1.9500000476837158, 1.9500000476837158, 1.940000057220459, 1.9299999475479126, 1.940000057220459, 1.9299999475479126, 2.630000114440918, 3.690000057220459, 3.690000057220459, 3.700000047683716, 3.690000057220459, 3.700000047683716, 3.7100000381469727, 3.7200000286102295, 3.7200000286102295, 3.7200000286102295, 3.7200000286102295, 3.740000009536743, 3.7699999809265137, 3.7300000190734863, 2.7200000286102295, 2.5, 2.319999933242798, 2.1700000762939453, 1.9299999475479126, 1.909999966621399, 1.7999999523162842, 1.7100000381469727, 1.6299999952316284, 1.559999942779541, 1.4900000095367432, 1.409999966621399, 1.350000023841858, 1.2799999713897705, 1.2400000095367432, 1.2300000190734863, 1.2400000095367432, 1.25, 1.2699999809265137, 1.2699999809265137, 1.2999999523162842, 1.309999942779541, 1.3300000429153442, 1.350000023841858, 1.3600000143051147, 1.3799999952316284, 1.399999976158142, 1.4199999570846558, 1.440000057220459, 1.5, 2.369999885559082, 2.319999933242798, 2.2799999713897705, 2.240000009536743, 2.2100000381469727, 2.1600000858306885, 2.140000104904175, 2.0999999046325684, 2.059999942779541, 2.0299999713897705, 2.009999990463257, 1.9800000190734863, 1.940000057220459, 1.9800000190734863, 2.0299999713897705, 2.0799999237060547, 2.1500000953674316, 2.2200000286102295, 2.2699999809265137, 1.4700000286102295, 1.4800000190734863, 2.700000047683716, 2.6700000762939453, 2.6600000858306885, 2.6500000953674316, 2.609999895095825, 2.5999999046325684, 2.5799999237060547, 2.569999933242798, 2.549999952316284, 2.5299999713897705, 2.509999990463257, 2.509999990463257, 2.5, 2.4800000190734863, 2.4700000286102295, 2.4700000286102295, 2.450000047683716, 2.4600000381469727, 2.430000066757202, 2.430000066757202, 2.430000066757202, 2.430000066757202, 2.4200000762939453, 2.430000066757202, 2.4200000762939453, 2.4100000858306885, 2.4100000858306885, 2.4000000953674316, 2.4100000858306885, 2.4100000858306885, 2.440000057220459, 2.5199999809265137, 2.5199999809265137, 2.5299999713897705, 2.5199999809265137, 2.25, 2.1600000858306885, 2.0299999713897705, 1.899999976158142, 1.899999976158142, 1.909999966621399, 1.8700000047683716, 1.9600000381469727, 1.9900000095367432, 2.0199999809265137, 1.840000033378601, 1.75, 1.6399999856948853, 1.5700000524520874, 1.5, 1.4299999475479126, 1.3700000047683716, 1.309999942779541, 1.25, 1.2100000381469727, 1.1699999570846558, 1.1200000047683716, 1.090000033378601, 1.059999942779541, 1.0299999713897705, 1.0700000524520874, 1.0800000429153442, 1.100000023841858, 1.1100000143051147, 1.1200000047683716, 1.1299999952316284, 1.149999976158142, 1.1799999475479126, 1.190000057220459, 1.2000000476837158, 1.2100000381469727, 1.2300000190734863, 1.25, 1.2699999809265137, 1.2999999523162842, 1.3200000524520874, 1.350000023841858, 1.3799999952316284, 1.409999966621399, 1.440000057220459, 1.4700000286102295]
    intensities: []
    

In this tutorial we will make basic tests to assert that both the robulab robot and the laptop are configured correctly. We will consider as well configured if we can start a PhaROS node that handle robulab robot, so we can publish motion messages through rostopic pub command and make it to move.

Setup

  1. Robulab charged and switched on.
  2. Laptop with Ubuntu 14.04
  3. ROS Indigo installed on laptop (Read: How to install ROS Indigo in Ubuntu 14.04)
  4. Your .bashrc file you should look like this:

    source /opt/ros/indigo/setup.bash
    source ~/PhaROS-ws/devel/setup.bash
    
    ROS_HOSTNAME=localhost
    ROS_MASTER_URI=http://localhost:11311
    
  5. PhaROS installed (Read: How to Install PhaROS).

  6. Robot should be unplugged and free to move.

Ok, lets test it

  1. Create a package for testing the robulab. In a terminal run (this could take a couple of minutes):

    $ pharos create testrobulab
    
  2. Open the Pharo image of your PhaROS package by running this:

    $ rosrun testrobulab edit
    
  3. Install the required software to controll Robulab by executing this script.

    Gofer it
        smalltalkhubUser: 'CAR'
        project: 'Robulab';
        configurationOf: 'PureROS';
        load.
    ((Smalltalk at: #ConfigurationOfPureROS) project version: #bleedingEdge) load: {'kompai'}.
    
  4. Connect your laptop to UBNT wireless network.

  5. Start ROS by running roscore in a terminal.

    $ roscore
    

    If everything goes fine it should print something like this:

    ...
    started roslaunch server http://achao:56856/
    ros_comm version 1.11.3
    
    SUMMARY
    ========
    
    PARAMETERS
     * /rosdistro: <...>
     * /rosversion: <...>
    
    NODES
    
    auto-starting new master
    process[master]: started with pid [4073]
    ROS_MASTER_URI=http://achao:11311/
    
    setting /run_id to 6e36ef46-005d-11e4-ac41-b8ee65bb26b0
    process[rosout-1]: started with pid [4086]
    started core service [/rosout]
    

    Where achao is the hostname of the laptop I am using.

  6. Be sure that the Pharo image has not http proxy set, or if it has, they are coherent with your network configuration. To deactivate it you can just execute this in a workspace:

    NetworkSystemSettings useHTTPProxy: false
    
  7. Open a workspace and execute:

    PureROSKompai new scriptKompai1
    

    change it to scriptKompai2 if you are using Robulab2. This will create a PhaROS node that you can check by executing:

    $ rosnode list
    

    and you would see

    /PharoHandle-1404143614
    /rosout
    
  8. Let’s check the available topics to publish, in a terminal execute:

    $ rostopic list
    

    and the list of topics should be:

    /command_velocity
    /initialpose
    /kompai/scan
    /kompai2/pose
    /kompai2/trajectory/differential
    /orientation
    /rosout
    /rosout_agg
    
  9. Let’s publish some motion message in /command_velocity. For that lets use the command pub for rostopic which has the following structure: rostopic pub <topic id> <topic type> <message> command. Press [TAB] key to autocomplete: topic id, topic type and get message template.

    $ rostopic pub /command_velocity geometry_msgs/Twist "linear:
      x: 0.0
      y: 0.0
      z: 0.0
    angular:
      x: 0.0
      y: 0.0
      z: 0.5"
    

And the robot will start to rotate. If so you are done :)

Recently, our research team tested a new robotics simulator named STDR Simulator. The simulator natively supports ROS Hydro, but we have still successfully installed it on ROS Groovy. Here is our installation record, hoping to help someone. (This record is also released on wiki.ros.org)

1. Get stdr_simulator from Github

Since stdr_simulator is a catkin package, you will need a catkin workspace in order to build the package from source. If you don’t already have a catkin workspace, you will find details in this ros tutorial.

cd your_catkin_ws/src
git clone https://github.com/stdr-simulator-ros-pkg/stdr_simulator.git

NOTE: on Ubuntu 13.04 (raring), where Qt5 is installed by default, you need to specify the path to qmake-qt4 when you invoke catkin_make:

catkin_make -DQT_QMAKE_EXECUTABLE=/usr/bin/qmake-qt4

2. Get cmake_modules for Groovy from Github

cmake_modules is a common repository for CMake Modules which are not distributed with CMake but are commonly used by ROS packages. You will need this package to solve some problems such as stdr_parser: Could not find module FindTinyXML.cmake.

git clone https://github.com/ros/cmake_modules.git

3. Get a catkin version map_server

You need to get a Groovy compatible catkin map_server package for compiling stdr_server and stdr_gui package: map_server. Then put it in your_catkin_ws/src

4. Build the simulator

Assuming you are still in your_catkin_ws/src directory:

cd ..
catkin_make

5. Possible problems in header or library path with map_server

Error 1: stdr_server/map_loader.h:32:37: fatal error: map_server/image_loader.h: No such file or directory

The easiest way to solve this error is that just replace #include “map_server/image_loader.h” by #include “the_absolute_path_of/map_server/image_loader.h” in stdr_server/map_loader.h file.

Error 2: /usr/bin/ld: cannot find -limage_loader

Solution:

sudo ln -s /opt/ros/groovy/stacks/navigation/map_server/lib/libimage_loader.so /usr/lib/libimage_loader.so

As i already shout in the FOSDEM 2014 slides post, i have presented PhaROS in the last edition of FOSDEM, under the title of PhaROS: Towards Live Environments in Robotics.

I bring now to you this video taken during the presentation. I wish you to enjoy it!

Sorry if my hair is disheveled :), i am not very photogenic.

http://mirror.as35701.net/video.fosdem.org/2014/K4401/Saturday/PhaROS.webm


Enjoy it!


As part of the PhaROS and related projects, Santiago Bragagnolo had developed TaksIt a  framework for to ease handling concurrency. Expressing and managing concurrent computations is indeed a concern of importance to develop applications that scale. A robotic application often have different processes dealing with different activities (e.g. preception, planning, …).

TaskIT provides abstractions to schedule and/or parallelize of the execution of pieces of code. They will be described in the forthcoming chapter of the Pharo for the Entreprise book. First content is already available online. You can also get the code by evaluating the following expression in a Pharo workspace:


Gofer it
smalltalkhubUser: 'sbragagnolo' project: 'TaskIT';
configurationOf: 'TaskIT';
loadVersion: #bleedingEdge


PhaROS has being in this last edition of FOSDEM (2014) we are proud to share our time and space with a lot of open source projects. Thank you very much for good feelings, feedback and sharing this amazing time.
Video and photos from this great event will be soon available here. Meanwhile, here are the slides

Keep tuned!